Showing posts sorted by relevance for query www.best hair style. Sort by date Show all posts

Sunday, October 16, 2016

Hair style|Mermaid Halloween Tutorial!


Love Halloween? Planning your costume already? Us too! 


Now that the nights are drawing in and the leaves are starting to fall, our thoughts are turning away from fun in the sun and towards all of the best things about autumn � pumpkin spice lattes, chunky knits and cosying up on the sofa � and of course, everyone�s favourite spookfest, Halloween!
If you�re bored of the usual witch and devil costumes, try something a bit different this year and go as a spooky mermaid. But this is no cutesy Disney Ariel look. Think sexy sirens on the rocks luring unsuspecting sailors to their watery end instead! Now just grab your clip-in hair extensions and follow Miss Alex�s guide to creating this show-stopping Halloween look.
First, get everything you need ready�

You�ll need
  • Your clip-in hair extensions
  • An old towel
  • Hair chalk in a blue/green shade of your choice
  • Fluffy make-up brush
  • 2 Blue/green eyeshadows
  • Wig cap or fishnet tights
  • Blue/green lipstick
  • Sectioning comb
  • Curling wand or iron
Get chalking
Before you apply your clip-in hair extensions, you need to use your hair chalk to create those cool Mermaid streaks. Alex has chosen a teal shade of hair chalk but any blue/green colour would work well. Lay your extensions on an old towel, take your chalk and start slowly building up the colour.
02.jpg

Press your chalk onto the hair in downwards strokes, starting at the ends and working upwards. You want to make each streak a slightly different length to make it look more relaxed. Chalk all of the wefts that you will be using for this look, then set them aside while you do your mermaid make-up.
Mermaid make-up
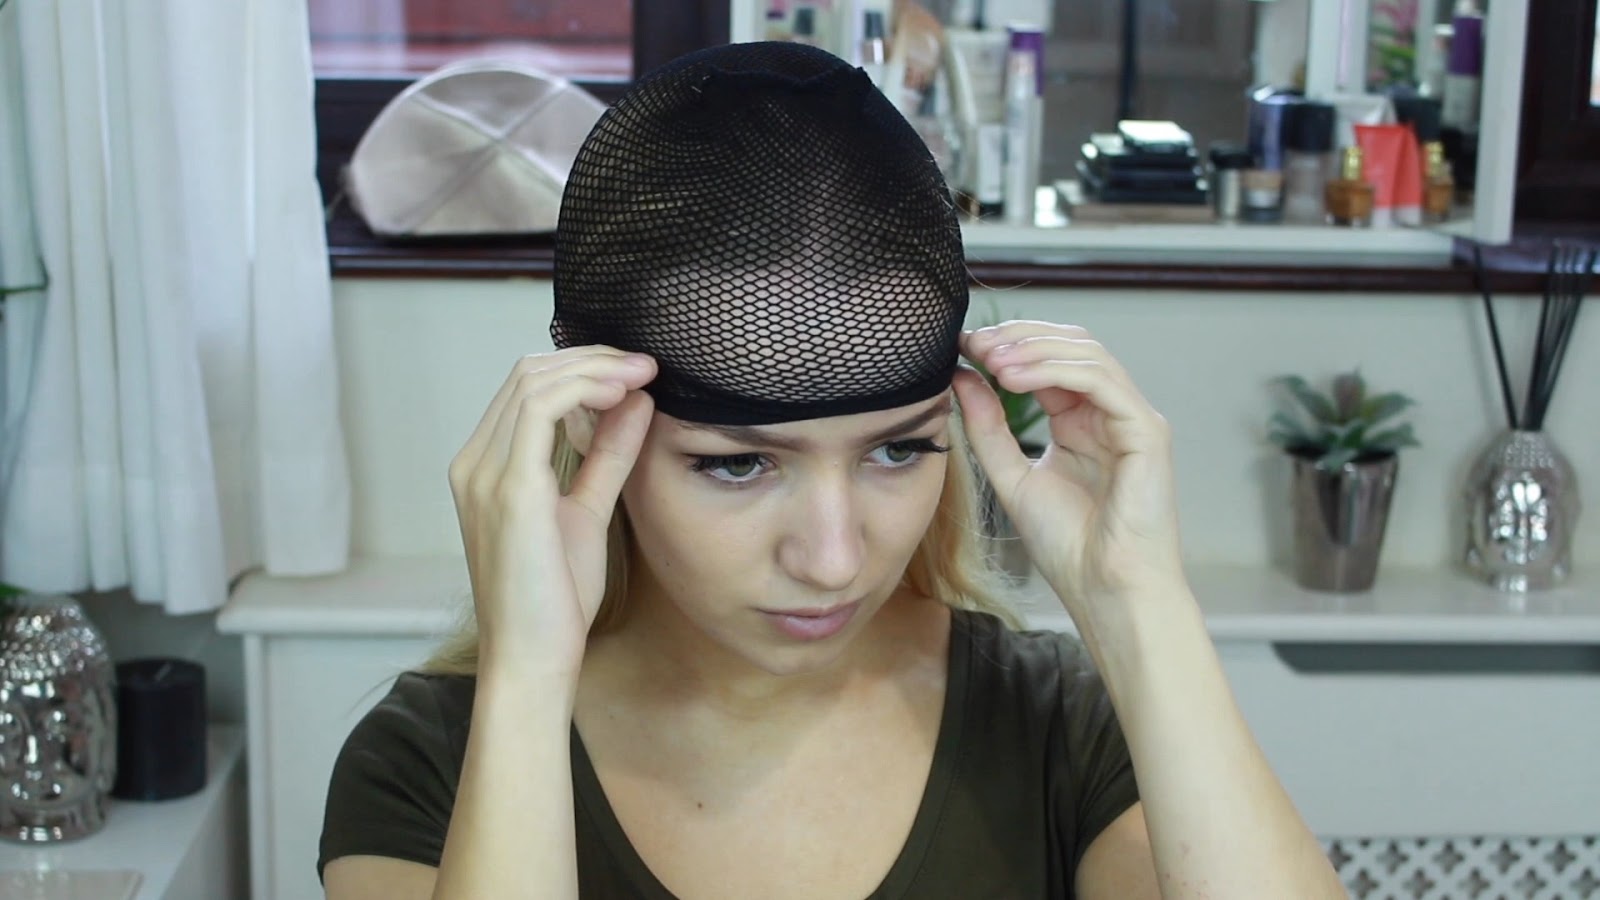
To get Alex�s clever fish scale make-up look, you need to take your wig cap or fishnet tights and put them on your head. No, really. First pull the fishnet pattern down so it covers your forehead.
03.jpg
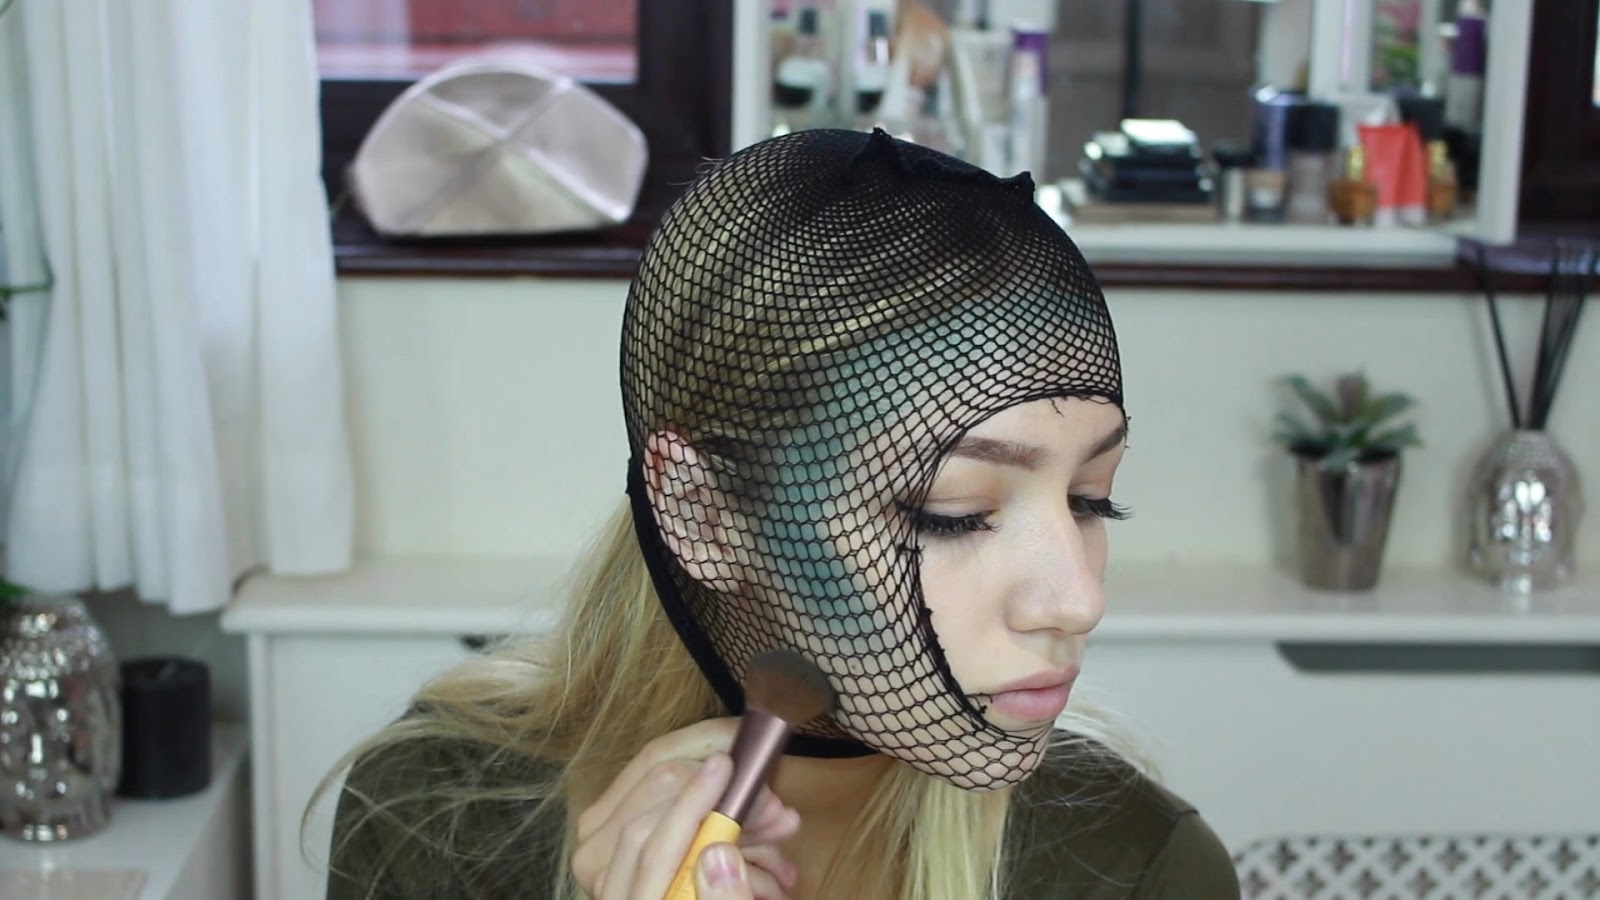
Take your fluffy brush, load it up with a darker blue-green eye shadow and dab it over the top of your forehead around your hairline. Try not to let the fishnet move as this is basically your stencil.
Next, use the lighter shimmery shade and apply this underneath the darker shade to create a gorgeous ombre effect. Gently take the fishnet off to reveal beautiful shimmery scales.
Now, pull the fishnets right over your face. You should have fishnets covering your cheeks and jaw. Use both of your shades to create the ombre effect again to contour your cheeks and jawline.
05.jpg
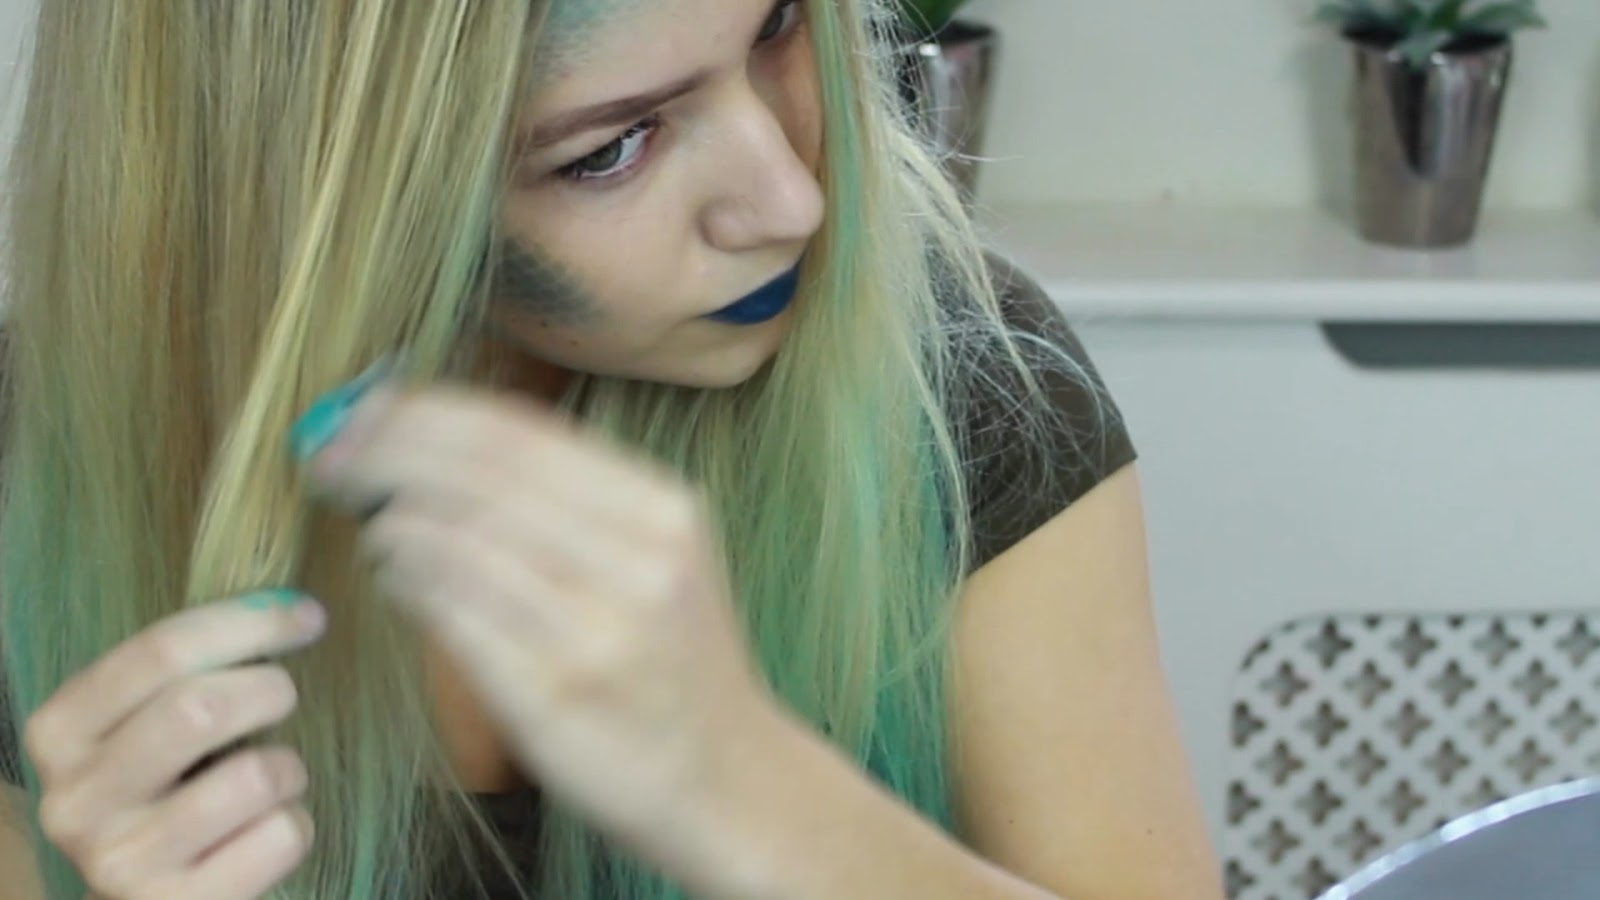
Carefully remove the fishnets and apply some blue lipstick to complete your mermaid make-up. Fish-tastic!
07.jpg
Stunning siren hair
Now it�s time to apply your chalked clip-in hair extensions. Brush your hair through so there are no knots, then section your hair and clip in your extensions as normal. If this is your first time, you can find out how to apply clip in hair extensions in an earlier post. We�ve got you covered ladies.
Once you have applied your extensions, take your hair chalk and simply chalk some strands of your natural hair so that it blends beautifully together with your extensions.
09.jpg
Then take your curling wand and add a few loose waves to give your style some volume and texture. Again, we�ve got your back with our awesome how to get loose curls post.
And it�s as easy as that - all you need is a seashell bra and a deadly singing voice and you�re ready to reel them in!. Happy Halloween!
If you�ve got any questions or tips you�d like to share, either leave a comment below or hit us up on Twitter,Facebook or YouTube
Job 19 600 x 1090.jpg


Read more

Saturday, November 19, 2016

Hair style|Everything you need to know about coloring your hair!


So, you want to have some color in your hair but you find it difficult to explain your needs to your hairstylist? This guide is for you!


Highlights:


They can be narrow, medium or wide, made with the use of foils or a hood. They always start from the root of your hair having a different color than your hair base. They provide a nice brightness effect to your face!


Lowlights:


Lowlights seem to be less popular, mostly due to the lack of knowledge for this particular technique. But they can do "magic" on your hair! If you love brightly toned glance but do not want a dramatic change in your appearance, then lowlights is the technique you should choose. Narrow or wide spaced tufts, separated from the remaining hair and painted two tones darker than the rest of your hair. I recommend adding lowlights every third time you do highlights. This will help you interlock your highlights to your natural color and have a more natural overall look.


Babylights:


Also made with the use of aluminum foil or free hand. They look like the effect that summer has on our hair. Small thin tufts brightened up, no more than two tones of your natural color. Babylights remind us of our childhood when our hair was softly brightened because of the sun light!


Ombre:


Ombre trend made its dynamic entrance in hairdressing just a few years ago and most of the women with long hair would try this technique at least once in their lives! Dark base with gradual lightening towards the tips, is what ombre is all about. The procedure is done with either aluminum foil or free hand. Your hairstylist should know this technique well enough and avoid creating color "bars" and abrupt transitions in color.


Sombre:


The substitute for ombre has a name: sombre! It is almost the same technique with the only difference that in sombre we have smoother color gradations. The difference in root and the tips are no more than 2 tones and the colors are more sweet and warm.


Balayage:


Having a French origin, this technique developed in the 1970s and is a free hand method where the color is applied by hand instead of using the traditional techniques of foil or hood. It is a "low cost" option because it does not start from the root of your hair and thus you don't have to repeat it regularly. It can be done in short hair as well, but the best results are achieved when the hair is below your shoulders. Balayage can be combined with ombre and give some amazing results to your hair!


Stencil Box:


Stencil box is to color specific sections of hair and add light, movement and volume to the hair. The result? A unique, almost-pixelated effect, that was first introduced by Terrence Michael Renk, Global Artistic Director for ProRituals by Jingles and Marilyn Brush.


Smoky Blonde:


2015 will be the Year of the bobs! Low bobs, assymetrical bobs, short bobs are already dominating hair fashion. The need to differentiate a bob haircut is also here. A contrast, strong color, which would make it stand out from the ordinary. This technique is dedicated to all of us who have shorter hair and can not follow the trends of ombre, sombre etc.


Of course there are plenty of other hair coloring techniques. But most of them only differ in color. You can convert an ombre from brown-to-strawberry-blonde to brown-to-blue or change the contrast of a smoky blonde to pink shades. If you fully understand the above techniques you can "play" and create by combining colors and techniques!

Article source: www.xtenismata.gr


Read more